Tuesday, Apr 16, 2019

Native navigation in React Native (and a few additional features)
React Native has recently became very popular among developers who want to create a mobile application both for Android and IOS using a single development environment. But, as native programming languages are not used, there are some disadvantages that will make your application less appealing when using React Native. We’ll be focusing on how to give your application a native feeling when used on both major mobile operating systems.
Introduction
Although implementing native navigation seems like a simple task, it can often result in less than ideal results in various cross-platforms tools. In this post, we will be using Wix React Native Navigation, which is currently on of the best iOS and Android solutions. It also includes additional tools for the taskbar, taskbar badges, navigation bar and its buttons and styling, etc. First, I will show you how to implement the native navigation, and then we will look at the additional benefits that it provides.
You can find my example app on my GitHub.
Before you begin, you need to set up Android Studio and Xcode for bavigation work properly. You can find the complete documentation here.
Let’s start coding using Wix
React Native navigation offers single screen and tab-based navigations. In this post, I will use the tab-based navigation and show you some of the possibilities it offers.
For a start, you need to set a few parameters like title, icon, and description, as well as register your screens.
Here is the code for adding two tabs (one tab for navigation types and one for extra stuff):
export default () => {
 Navigation.registerComponent('ExtraIndex', () => ExtraIndex);
 Navigation.registerComponent('ExtraEdit', () => ExtraEdit);
 Navigation.registerComponent('ExtraNotification', () => ExtraNotification);
 Navigation.registerComponent('NavigationIndex', () => NavigationIndex);
 Navigation.registerComponent('GenericScreen', () => GenericScreen);
 Navigation.registerComponent('LightBox', () => LightBox);

 Navigation.startTabBasedApp({
   tabs: [
     {
       label: 'Navigation',
       screen: 'NavigationIndex',
       icon: require('./images/icon1.png'),
       title: 'Navigation Screen'
     },
     {
       label: 'Extra',
       screen: 'ExtraIndex',
       icon: require('./images/icon2.png'),
       title: 'Extra Screen'
     }
   ],
   passProps: {}
 });
};
Native Navigation
React native navigation supports all standard navigation screen types (push, pop, modal, lightbox, etc.).

Push
Here is an example of push screen navigation in which we will define a few extra settings. We will set the title, subtitle, animation, horizontal slide, and the back button:
this.props.navigator.push({
    screen: 'GenericScreen',
    title: 'Push Screen',
    subtitle: 'Welcome',
    animated: true,
    animationType: 'slide-horizontal',
    backButtonHidden: false
})
Modal
React native navigation also enables the display of the modal screen. Here’s an example of how to do it:
this.props.navigator.showModal({
    screen: 'GenericScreen',
    title: 'Modal Screen',
    animationType: 'slide-up'
})
LightBox
In addition to the lightbox presentation, you can also style it:
this.props.navigator.showLightBox({
    screen: 'LightBox',
    style: {
        backgroundBlur: 'dark',
        backgroundColor: 'rgba(52, 52, 52, 0.8)',
        tapBackgroundToDismiss: true
    }
})
Extra benefits
Other than the native navigation, there are quite a few other useful additions.

Tab bar badges
You can add badges to your tabs very easily. Here is how:
this.props.navigator.setTabBadge({
    badge: 12
});
Altenatively, you can remove badges completely by setting them to zero:
this.props.navigator.setTabBadge({
    badge: 0
});
Passing properties
Although you are probably already using passProps in your application, you can do the same in this fashion:
this.props.navigator.push({
    screen: 'ExtraEdit',
    title: 'Screen 3',
    passProps: {
    name: text
    }
});
Notifications
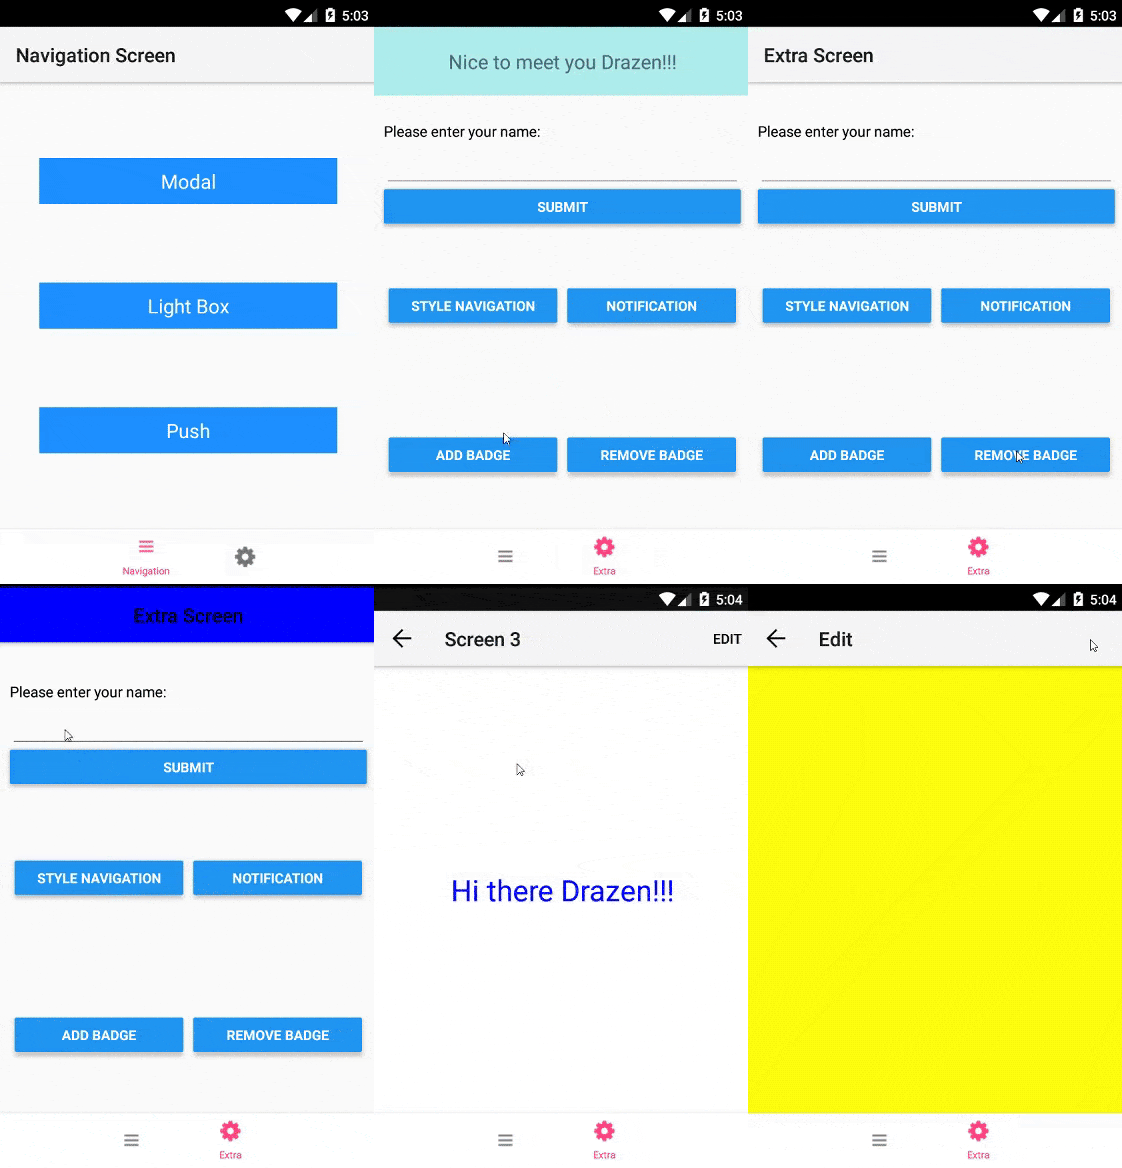
If you want to display notifications within your application, you can do that using showInAppNotification, and there is even a timer for hiding them. You can also use passProps here. It’s convenient here because you can pass text to the notification screen:
this.props.navigator.showInAppNotification({
    screen: 'ExtraNotification',
    autoDismissTimerSec: 2,
    passProps: {
    text: 'Drazen'
    }
})
Style navigation bar
Navigation bar can also be customized in the way you want. Here’s an example of how to easily change the styling:
this.props.navigator.setStyle({
    navBarBackgroundColor: 'blue',
    navBarTitleTextCentered: true,
    statusBarHidden: true
});
Adding buttons to navigation bar
The navigation bar buttons can be defined per-screen by adding static navigatorButtons = {...}; to the screen component definition. This object can also be passed when the screen is originally created and can be overridden when a screen is pushed. Handle onPress events for the buttons by setting your handler with navigator.setOnNavigatorEvent(callback):
class Screen extends Component {
 constructor(props) {
   super(props);
   this.props.navigator.setOnNavigatorEvent(this.onNavigatorEvent.bind(this));
 }

 static navigatorButtons = {
   rightButtons: [
     {
       title: 'Edit',
       id: 'edit',
       buttonColor: 'black',
       buttonFontSize: 14,
       buttonFontWeight: '600'
     }]
 }

 onNavigatorEvent(event) {
   if (event.type == 'NavBarButtonPress') {
     if (event.id == 'edit') {
       this.props.navigator.push({
         screen: 'GenericScreen',
         title: 'Edit',
         passProps: {
           color: { backgroundColor: 'yellow', flex: 1 }
         }
       });
     }
   }
 }
Wix, in addition to its standard navigation, offers plenty of other features that can be utilized. Hopefully, this blog post helped you recognize some of them, so you can try to use them in your mobile applications.